
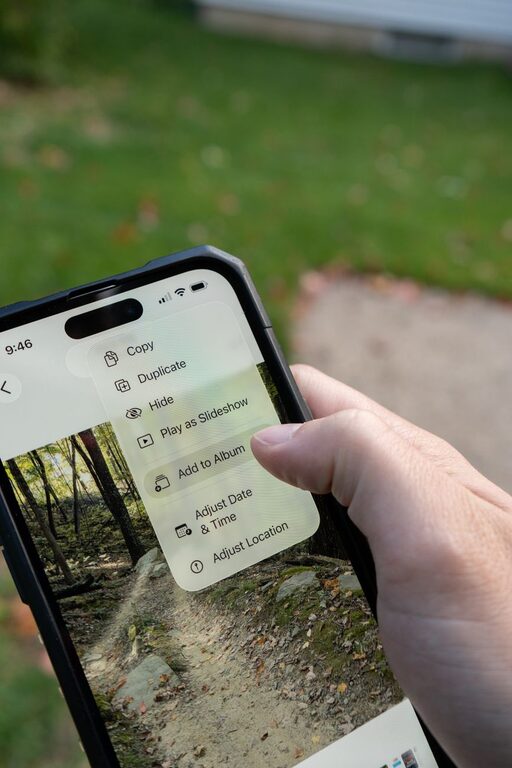
Taking photos on your phone is easy. Keeping them organized is another matter. Screenshots, family pictures, travel memories, receipts, downloads, and duplicate images can quickly turn your camera roll into a crowded collection.
The good news is that you do not need a complicated system. A few consistent habits can make your photos easier to browse, search, back up, and share. The key is to organize in a way that fits how you already use your phone.
Start With a Quick Cleanup
Before creating a new system, remove the photos you no longer need. Cleaning everything at once may feel overwhelming, so work in short sessions.
Start with items that are easy to identify:
– Blurry or accidental photos
– Duplicate images
– Screenshots you no longer need
– Downloaded pictures
– Old memes and temporary images
– Photos of receipts after you have recorded the information
– Videos that did not turn out well
Many phones group screenshots, videos, selfies, and other categories automatically. Use these sections to review similar files together instead of scrolling through your entire library.
If your phone offers a feature for finding duplicates, review its suggestions carefully. Keep the clearest version, especially when several photos look nearly identical.
Use a Simple Rule
When deciding whether to keep a photo, ask:
- Does this image have personal or practical value?
- Would I miss it if it were gone?
- Is there a better version already saved?
If the answer is no, delete it. You can also place uncertain images in a temporary album and review them again after a few weeks.
Create Albums That Match Your Life
Albums are useful when they reflect the way you think about your photos. Avoid creating too many narrow categories, because an overly detailed system can become difficult to maintain.
Good album ideas include:
– Trips and vacations
– Family and friends
– Pets
– Home projects
– Special occasions
– Recipes and cooking ideas
– Documents to review
– Favorite memories
You can organize by event, person, place, or purpose. For example, “Summer Road Trip 2025” is usually more helpful than an album simply called “Travel.” A specific name makes the album easier to recognize later.
Do Not Overfill Albums
An album does not need to contain every related image. Add the best or most useful photos rather than every single shot. This keeps albums easy to browse and saves you from repeating the same cleanup work later.
For large events, consider using a main album and a smaller selection album. For example, you might keep all vacation pictures in one album and create a second album called “Vacation Favorites” for the images you are most likely to share.
Use Favorites for Your Best Photos
The Favorites feature is one of the simplest ways to create a quick-access collection. Mark photos that you enjoy, want to share often, or may use for a project.
Favorites can include:
– Important family moments
– Your best travel photos
– Images you use for profile pictures
– Photos needed for a presentation or project
– Pictures you want to print
Try not to mark everything as a favorite. If the collection becomes too large, it stops being useful. A smaller group makes it easier to find your most important images.
Name and Sort Photos When It Helps
Most phone photo apps organize images by date automatically. That is helpful, but dates do not always tell you what an image shows. Albums with clear names can add useful context.
Use simple, consistent names such as:
– 2026 New York Trip
– Birthday Party
– Garden Project
– School Events
– Holiday Baking
Including the year can help when you have recurring events. Keep names short enough to read easily on a phone screen.
If you transfer photos to a computer, external drive, or another storage location, use a similar folder structure. For example:
– Photos
– 2026
– 2026 01 Winter
– 2026 02 Family
– 2026 03 Travel
You do not need to rename every individual photo. Organizing them into clearly labeled folders is often enough.
Separate Personal Photos From Temporary Images
Screenshots and saved images can overwhelm your main photo library. If your phone allows it, keep them in their own albums or folders.
Create categories such as:
– Screenshots
– Saved ideas
– Work images
– Receipts
– Reference images
Review these categories regularly. Temporary images are often the easiest files to delete because they serve a short-term purpose.
For example, if you save a picture of a product while shopping, delete it after you make your decision. If you take a screenshot of an event detail, remove it after the event has passed.
Use Search Instead of Relying Only on Albums
Modern photo apps often let you search by date, location, subject, or visible text. Search can save time when you remember what is in a photo but not when you took it.
Try searching for:
– A city or location
– A person’s name
– “Dog,” “beach,” or another subject
– A month or year
– “Screenshots”
– Words visible in an image, such as a sign or document
Search features are not always perfect, so albums still have value. Use search for quick discovery and albums for collections you want to maintain over time.
Back Up Your Photos
Organization helps you find photos, but backups help protect them. A phone can be lost, damaged, or replaced, so avoid keeping your only copies in one place.
Choose a backup method that suits your needs:
– An automatic photo backup service
– A computer
– An external storage device
– A second device
– A combination of these options
Check that backups are actually working. Open the backup app or service and confirm that recent photos appear there. If your storage is limited, review the service settings and remove unnecessary files before adding more space.
Remember that syncing and backing up are not always the same. With some services, deleting a photo on your phone may also remove it from the synced library. Learn how your chosen service handles deletions before cleaning up a large number of images.
Build a Small Weekly Routine
A few minutes each week can prevent your library from becoming difficult to manage. Pick a regular day and complete a short review.
A simple routine might include:
- Delete blurry photos and duplicates.
- Review screenshots and downloads.
- Add important pictures to an album.
- Mark a few favorites.
- Check that recent photos are backed up.
- Empty the deleted items folder when you are sure you no longer need the files.
You can also schedule a larger review once or twice a year. Use that time to update older albums, remove outdated temporary images, and check your storage space.
Avoid Common Organization Mistakes
The best system is one you will continue using. Avoid methods that create unnecessary work.
Common mistakes include:
– Creating an album for every small occasion
– Keeping multiple copies of the same photo
– Marking hundreds of images as favorites
– Waiting several years before cleaning up
– Relying on memory instead of clear album names
– Assuming photos are backed up without checking
– Deleting files before confirming that an important copy exists
Start with a system that takes only a few minutes to maintain. You can make it more detailed later if needed.
Make Organization a Habit
An organized photo library does not require perfection. It requires a few repeatable choices: delete what you do not need, group important images clearly, use favorites selectively, and keep a reliable backup.
Begin with one small section of your camera roll today, such as screenshots or duplicate photos. Once that section is under control, the rest of your library will feel much easier to manage.